
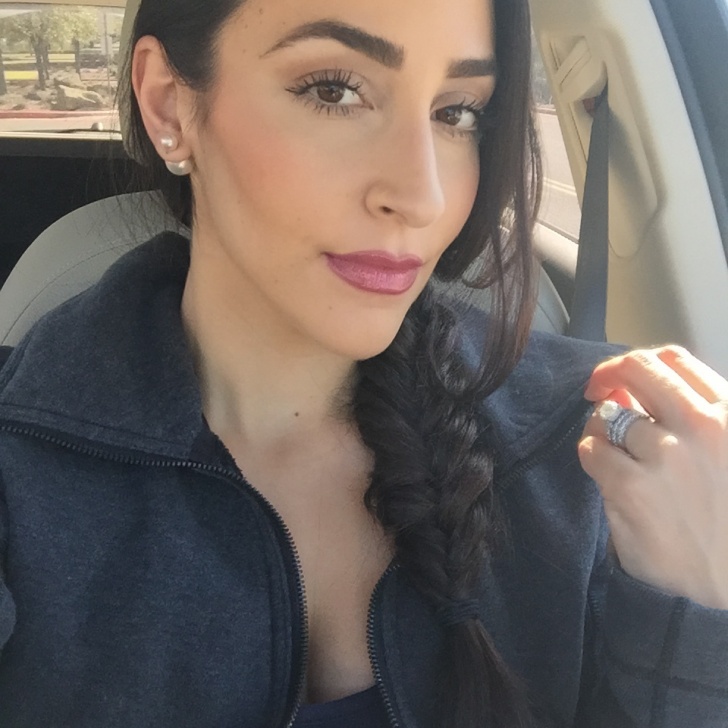
You hit snooze one time…two times…three times, and before you know it, you’re almost late! Don’t panic, I’ve got your back.
If you’ve been following my blog for a while now, then you know I am a major beauty junkie. I love all things beauty related. So, as you can imagine, I enjoy taking my time while getting ready. It’s just fun for me, but let’s be realistic…most days, ain’t nobody got time for that! Even on the days when I don’t have very much time, I still want to look polished. I got the idea for this post yesterday morning when I overslept and realized I had a little under 10 minutes to get ready before taking Berklee to the vet – 0pps! We’ve all been there, right? The goal of this tutorial is minimal products with maximal effect. When you don’t have more than 10 minutes, but you still want to look put together, this look with do the trick. This look is also perfect for you gals who travel a lot and want to pack as light as possible.
Ok, let’s do this…
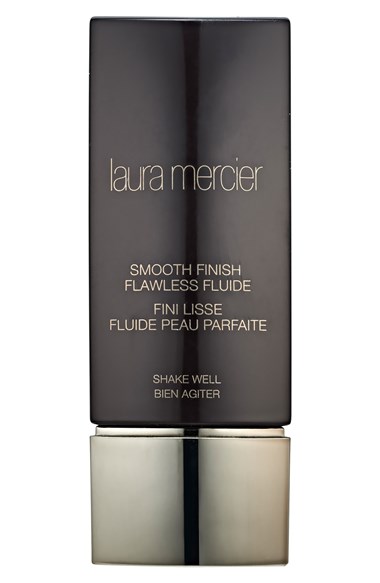
Step 1 : Foundation or Tinted Moisturizer – If I’m running lots of errands and/or going to be inside most of the day, I will opt for foundation and if I know I’ll be out side most of the day, I’ll go with the tinted moisturizer or bb/cc cream. I recently picked up the new Laura Mercier Foundation and I have been absolutely loving it! It’s oil free, gives such a beautiful finish, lasts all day and has just the right amount of coverage. Perfect for a day when I want to look put together but natural. My favorite way to apply foundation is with a damp beauty blender. If you don’t own one, trust me, it’s a major must! It makes the application flawless and very speedy.
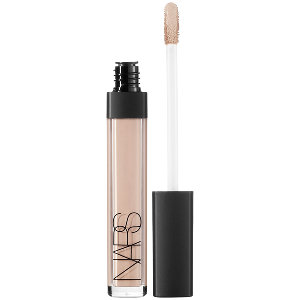
Step 2 : Concealer – Apply your favorite concealer in a small triangle under your eyes and blend it in with the pointed side of the beauty blender. Take whatever you have left over on your beauty blender and stipple it onto your eyelids. This will give a nice clean canvas and help your eyes look more awake.
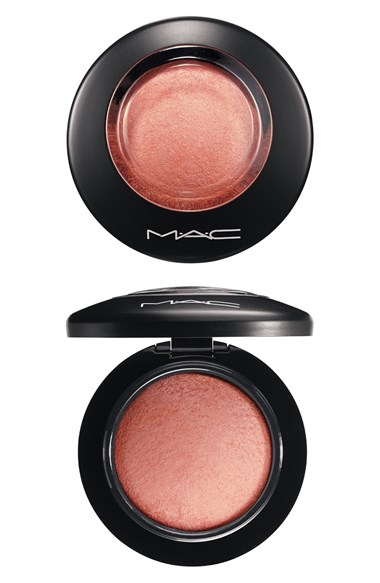
Step 3: Blush – Adding a little color to your face makes a world of difference! Lately, I have been obsessed with Warm Soul by Mac. I really can’t say enough good things about this blush. It’s the most beautiful peachy, golden color with a sheen that gives my skin such a healthy wash of color. Tip – Take a fluffy brush and throw a little bit of blush in your crease (you can also use bronzer if you prefer), this will give your eyes a little dimension without having to deal with any eyeshadow.
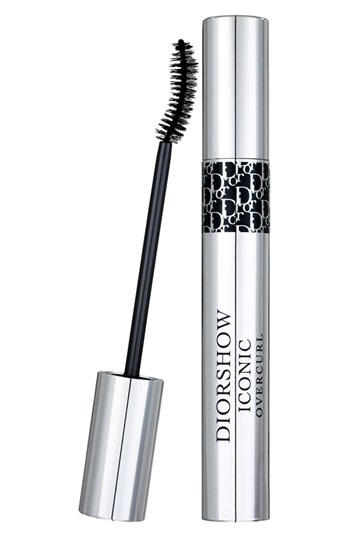
Step 4: Mascara (and eyelash curler) – First, curl your lashes. This will instantly wake your whole face up! This is all-time favorite eyelash curler and by far the best one on the market! Then, apply mascara to your lashes. I’m currently loving this one because it really seems to look in the curl.
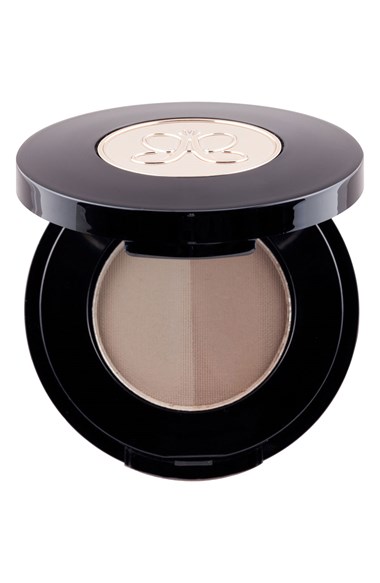
Step 5: Brows – This step will be a little differently for everyone. My brows are naturally really thick and shaped how I like them, so all I do usually is add a little powder in sparse areas. If I’m feeling extra lazy, I’ll do nothing or add a little tinted brow gel. I did a whole post of all things brows here, if you want to check it out. Brows are crucial and totally worth taking the two minutes to do. They will frame your whole face and automatically have you looking more put together, so take a sec to do your thang girl!
Step 6: Lips – The final step! You can completely skip this step all together and just use some chap-stick if you’re in a major rush but if you still have a minute at this point, add your favorite lip. This look with pair beautifully with just about any lip you want. If you just want to look pretty and natural, throw on a nude lip, but if you want to add a bit of a statement go for a bold lip! Don’t be afraid to have a little fun with it :).
Well, that’s it for today :). Let me know if you try this look on yourself!