Contouring is a skill I believe every women should have. Why? When done right, it’s super flattering and can help to accentuate your best features. I think a lot of people hear the words ‘contour’ and ‘highlight’ and get immediately freaked out. I promise it’s actually super easy!
First things first: decide if you want to contour with a powder or a cream. The technique is the same for both, it’s really just a matter of skin type (oily, dry, normal) and preference. I have “normal” skin and personally love both powder and cream. I sometimes even use them together!
WHO SHOULD USE CREAM?
People who have normal to very dry skin or people who want a natural look.
WHO SHOULD USE POWDER?
People who have oily skin or want a more structured look.
WHO SHOULD USE THEM TOGETHER?
If you’re going to an event (wedding etc.) and really want to lock your contour in, using a cream and then setting it with a powder is a great option.
FAVORITE PRODUCTS TO CONTOUR WITH…
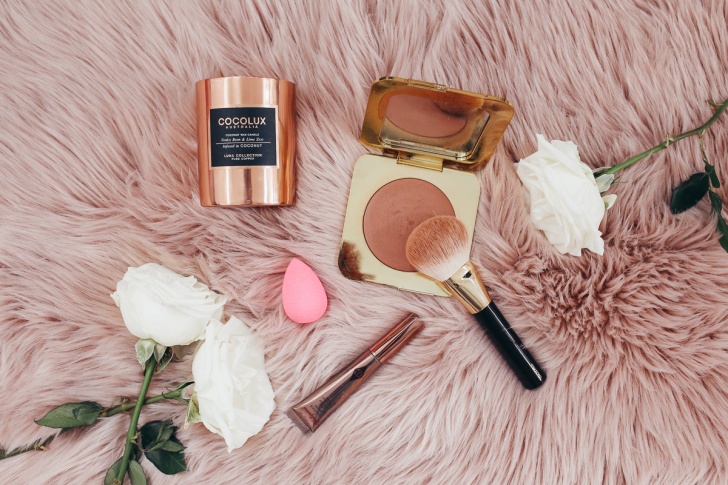
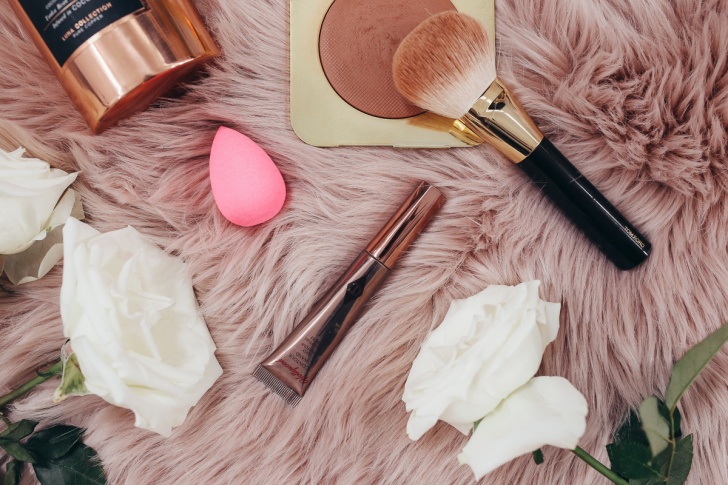
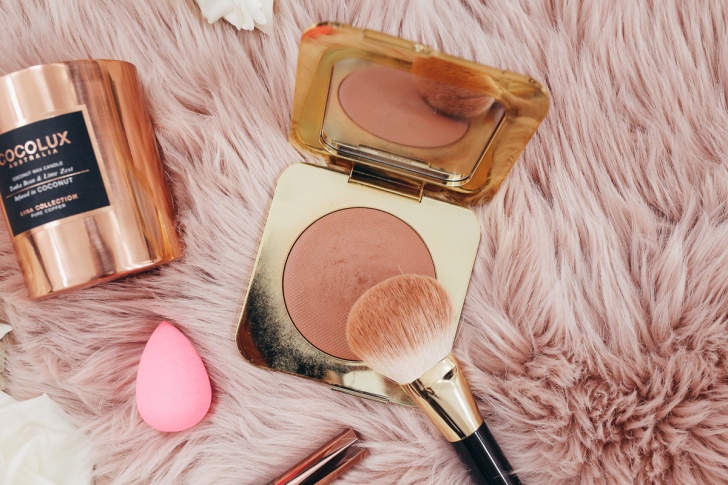
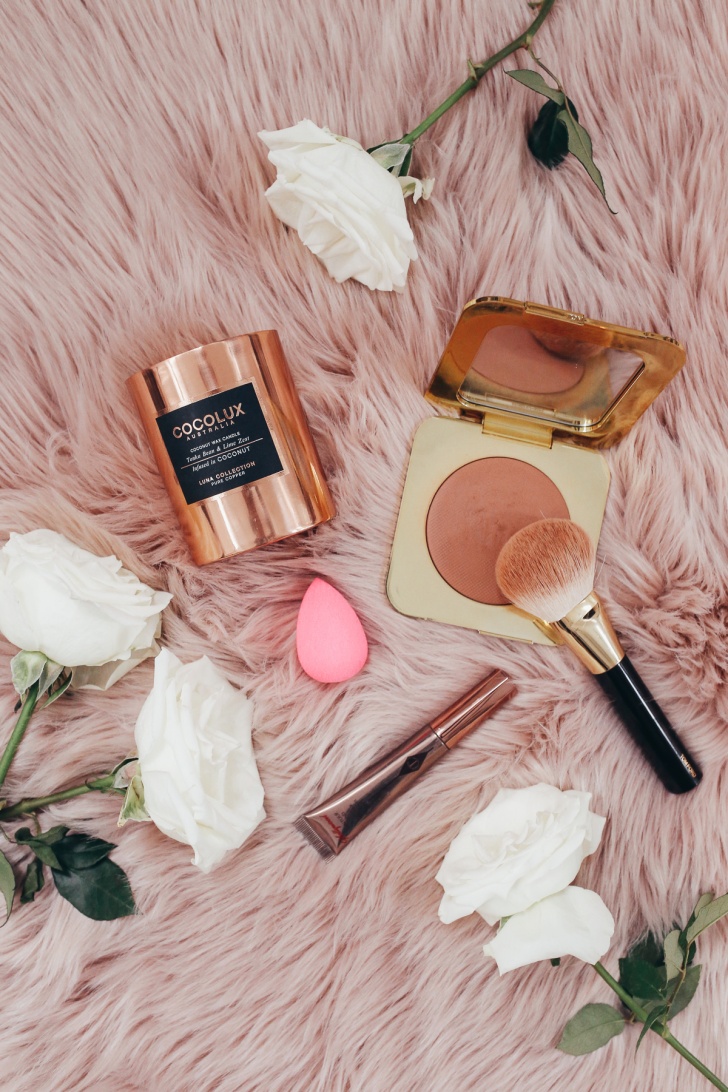
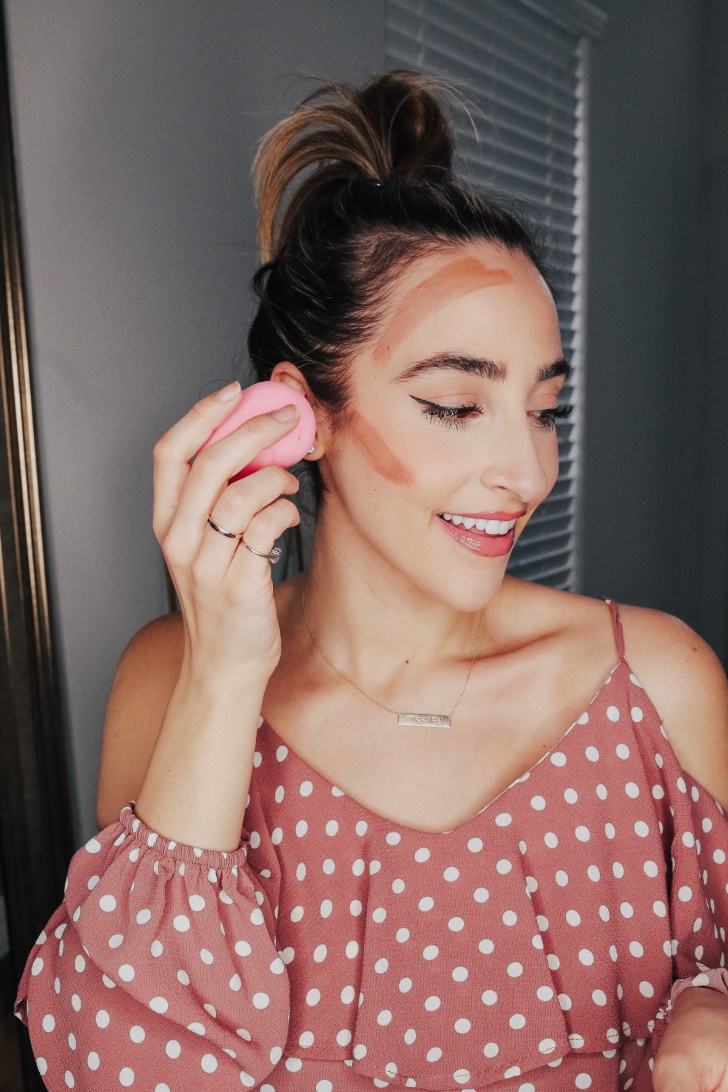
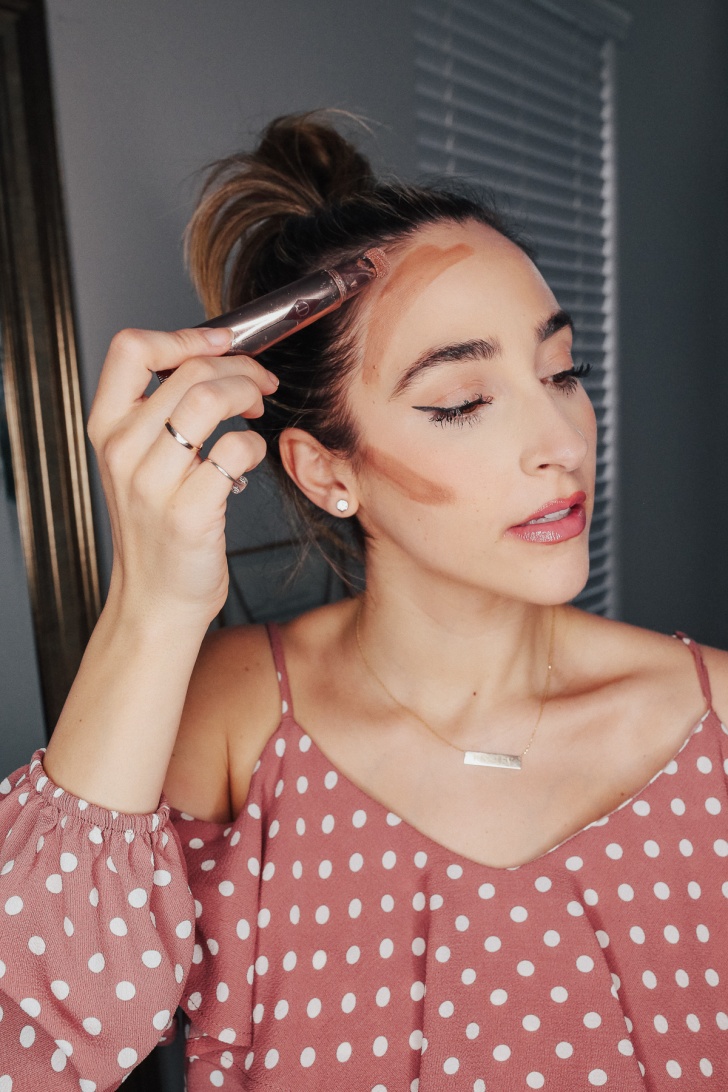
When it comes to creams, this contour wand is my current favorite! I found it about two months ago while browsing Nordstrom online, immediately ordered (because hello free shipping!), and have loved it ever since. It’s super easy to use, you just squeeze and the contour color comes out onto the applicator! Once you have a bit on the applicator, draw it on…it’s that easy! I have a tutorial of how I use it on my Instagram profile under the “beauty” highlight. Once I’ve drawn it on, I like to blend it out with a damp beauty blender! It looks so natural and subtle, yet sculpted! I use the “light-medium” shade but it also comes in a darker shade.
If you’re a powder girl, I have two favorites – the first is the Tom Ford bronzer. If you have been following me for a while, you have heard me rave about this beauty countless times! It’s the most beautiful bronzer I’ve ever used. It blends out like a total dream, and is hard to over-do. I have the shade “Gold Dust”, but I love it so much that I just picked up the color “Terra” too! I originally purchased the smaller one and fell so in love that I ordered the big size the moment I hit pan. If you have been wanting to bite the bullet and try it, but find the price tag a little steep, you can always start with the smaller one like I did to test it out first.
If you are looking for a more traditional contour color, this one is my favorite of all-time! It’s the absolute perfect neutral shade that flatters a ton of skin tones. I also really love the highlight shade in this duo! I’ve used this for a few years now and it’s still one of my top favorites.
My favorite brush to contour with is this one! The angle is perfect to fit under the cheek bones and it blends beautifully.
WHERE TO PLACE THE CONTOUR?
You can really go all out and contour your nose, lip etc. but let’s just focus on the basics: the forehead and the cheekbones.
Pro-tip: You want the shadow (aka. contour) to be under your cheek bone, so if you are using the cream contour wand, try to cheat up a little higher and blend upwards. If you blend down too low, you will drag your face down and it will have the opposite effect. We’re going for a lifted look!
When it comes to the forehead, contouring with shorten the look of your face. So, if you have a short forehead you’re going to want to apply less contour and if you have a long forehead you want to apply more!
The hoodie I’m wearing today on stories – shop here, sized up to a medium
Thank you to Nordstrom for sponsoring this post. All opinions are, of course, my own.
