
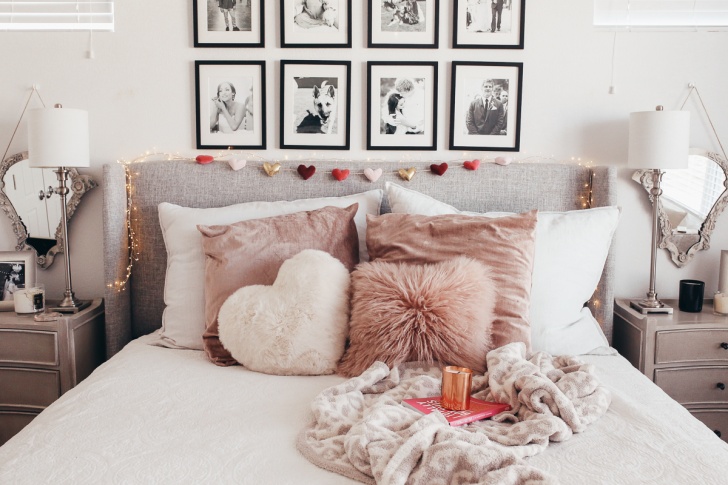
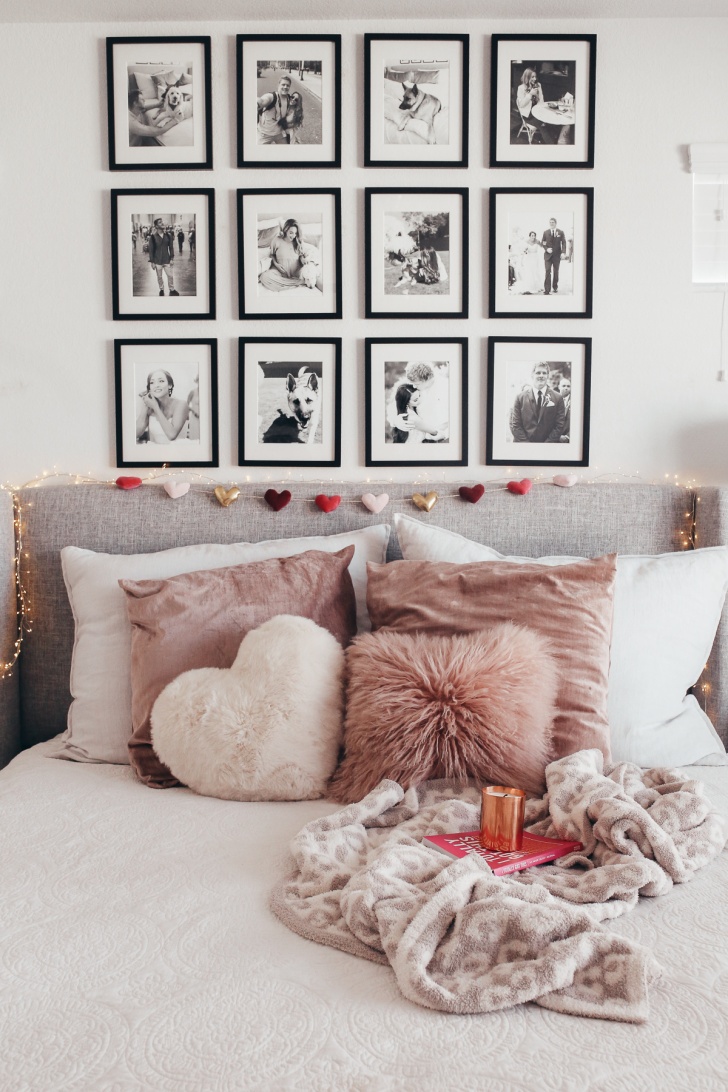
Happy Monday, babes! Here is a little peek into our current and oh so cozy bedroom. I recently added a few, sweet little (pink of course) touches to prep for Valentines and thought it would be fun to share. As well as share all the details on our gallery wall and give you tips on how you can create and hang your own.
Ever since we updated our bedroom last year, I’ve had countless questions about our gallery wall. I always laugh a little when you guys ask me how I hung it, because if I’m being honestly, Alex was the hanger! I of course picked out all the photos, designed the gallery and mostly importantly, watched and offered “moral support” like a good wife should! I even brought him the Trader Joes spinach and artichoke dip as a snack (pre us being dairy free of course), but since he was busy hanging I ended up eating most of it – oops! Some of the most commonly asked questions are: What frames did we use? How big are the photos? Tips for hanging a gallery wall? So, todays post is just that. All of my tips and tricks for creating and hanging the perfect gallery wall. You can apply these tips and use them anywhere in your house. I hope this helps and if you have any more questions, feel free to leave a comment on this post!

COMMON THEME
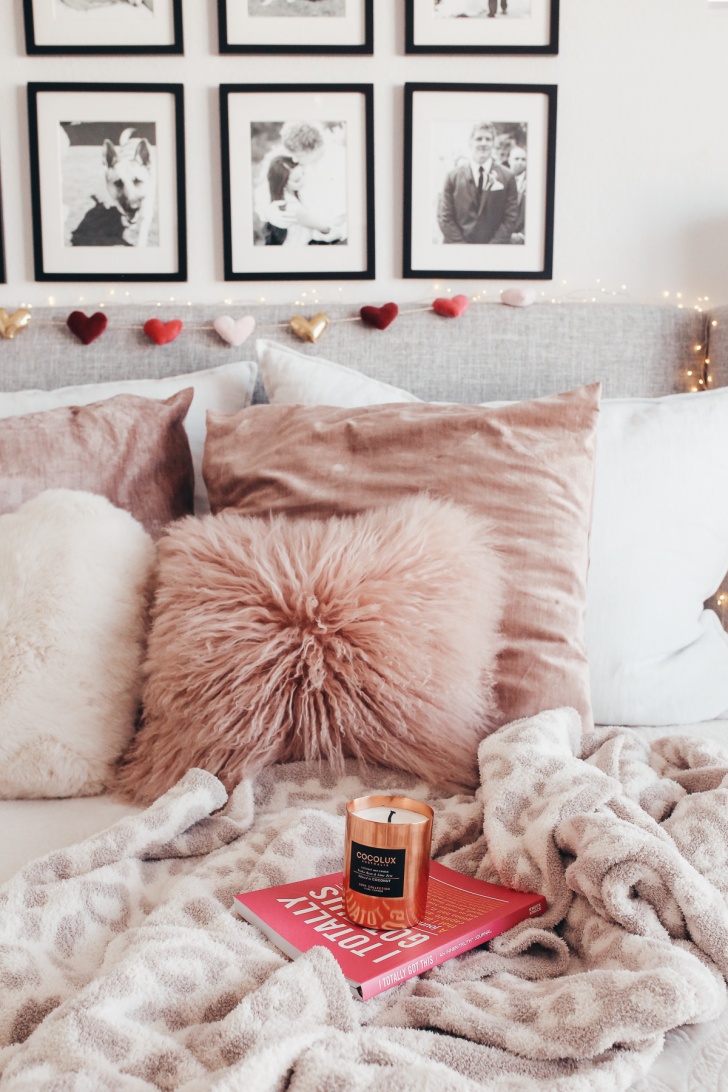
One of my biggest tips when designing the over-all look and feel of your gallery is to make sure that there is a common theme. In other words, something that ties everything together. Ours? Black and white, family photos. You can really do anything here: colors or even a theme like cute zoo animals for a nursery, pinks for a girl boss office or really anything. It doesn’t matter what “theme” you pick, just make sure you have one so that everything looks like it belongs together before you even get started.
PICK A FRAME
One for the questions I get asked most are which frames we have as well as the size of our photos etc. I actually found our frames here, they are a total steal and I have been happy with the quality. I love the thick white matting and thin and simple, black frame. Our actual photos themselves are 8×10’s.
LAY IT OUT
Before you even start to measure or hang, I recommend laying everything out on the floor (exactly like you want it on the wall). This is a trick I learned from my mom and have used ever since! It’s the best way to really see how things will look, spacing etc. I also recommend taking a photo of it, so you can reference it later.
MEASURE, MEASURE, MEASURE
No matter how you want your gallery wall spaced, measuring it multiple times is major key! What’s the expression? Measure twice, nail once…YUP. Trust me, you don’t want to be halfway through hanging your gallery only to realize you measured wrong.
Pro tip #1 – Take into account the hanging mechanism on the back of the frame when measuring and thinking of spacing.
Pro tip #2 – Measure from the center point and work your way out! Using our gallery as an example, we measured from the center of our headboard (not the middle of our walls).
THE LIGHTHOUSE
Hang one frame or one row first (I call this the lighthouse because it’s a beacon for the rest) and then measure the rest off that one. We also used this tip when applying the rose gold dots to Kinsley’s walls. We started with one row, got it perfect and then measured the rest accordingly.
Now, we just need to update it and add photos of Kinsley! 🙂
