
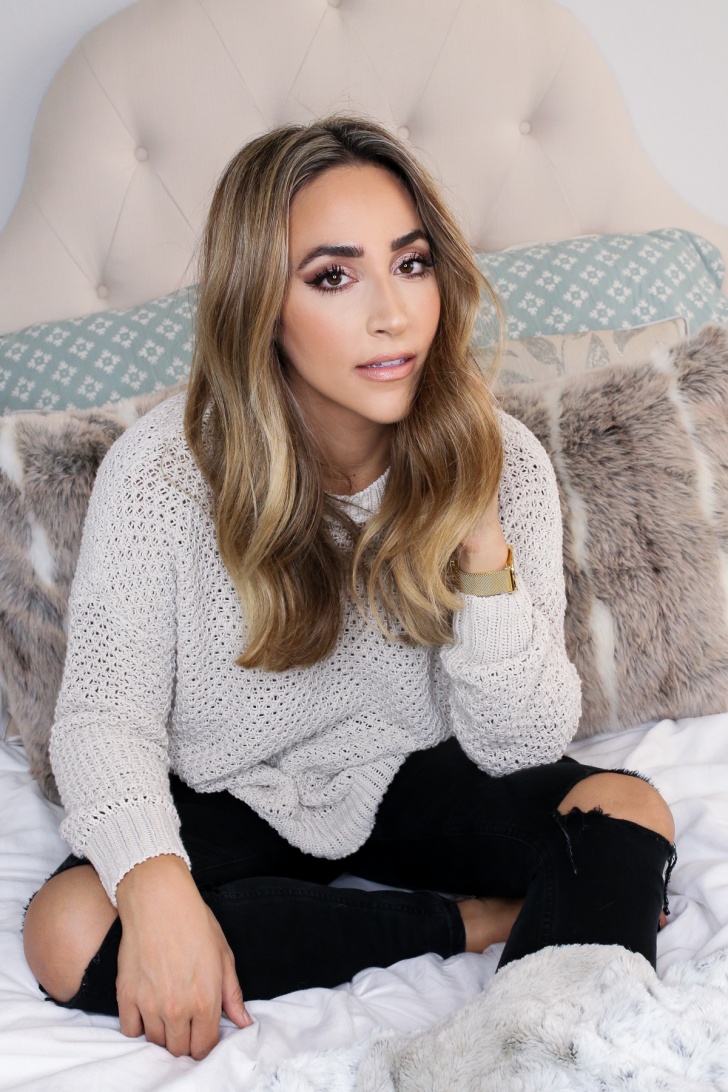
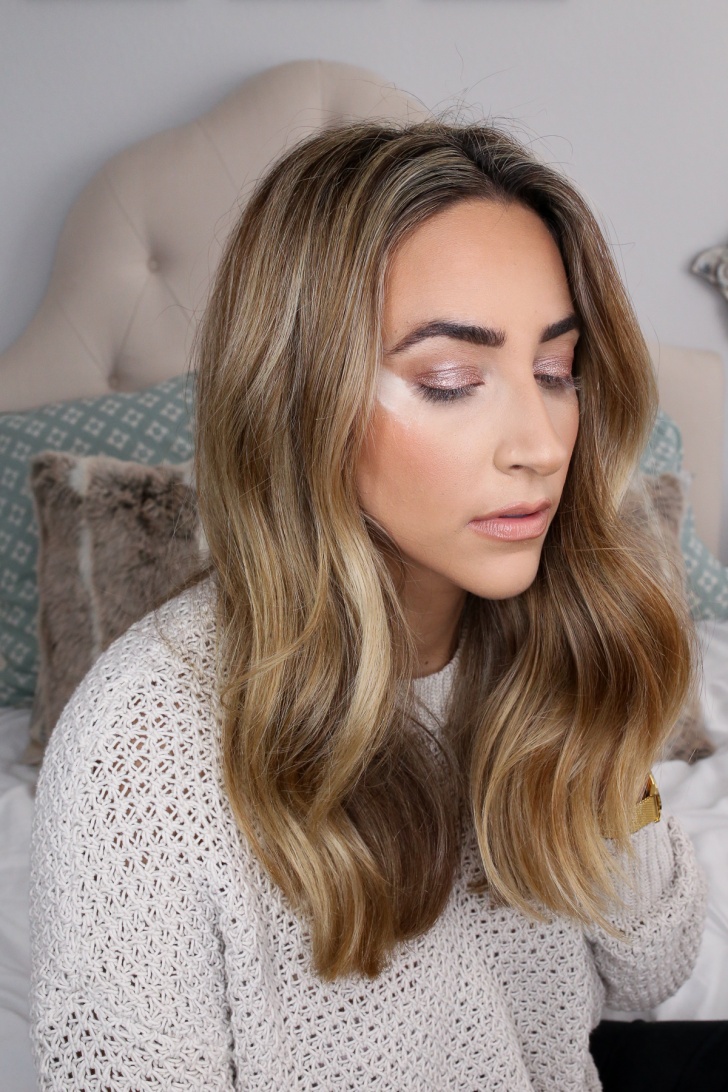
One of my favorite things about makeup is that it’s fun! It might sound silly, but I love that one day I can go minimal and natural and the next, full on glam. For the past couple of months, I’ve been opting for a less is more look, but thought it would be fun to create something more glam today!
Nordstrom is one of my all time favorite stores for many reasons: their customer service, the array of brands and price points they carry and most of all, the fact that I can find everything in one place! Nordstrom allows me to really get creative and go from one section of the store to another.
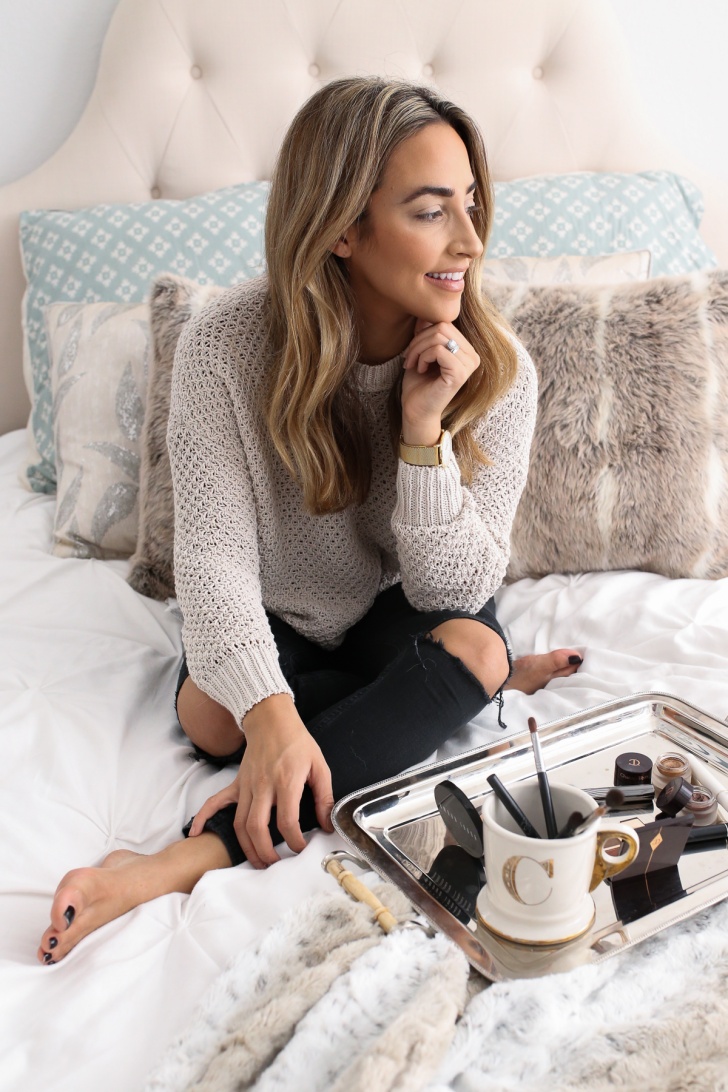
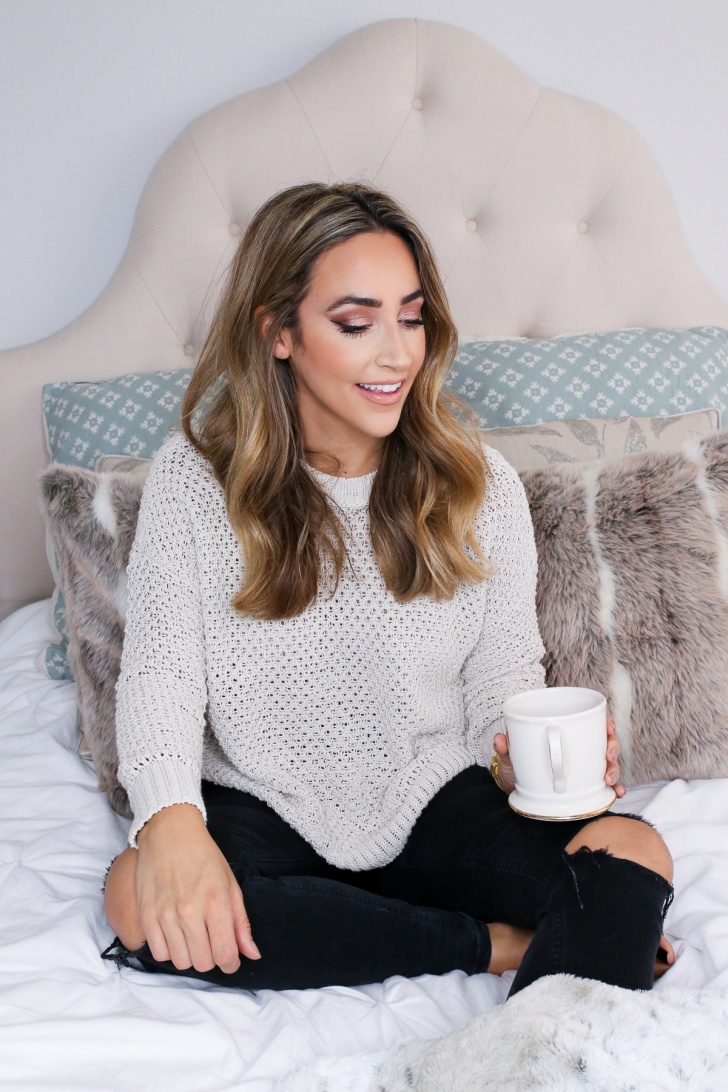
So, when creating this look, I wanted to think outside the box and do the unexpected. I decided to pair a more glam makeup look with a cozy and causal outfit and I absolutely love the outcome! There’s something so effortlessly cool about it. You could pair it with slip on sneakers for a day time look, or easily transition it into night with a pair of heels or booties!
In todays post, I’m sharing a step by step tutorial on how to get this ‘Cozy Glam’ look and a few new tips and tricks to help you step up your makeup game this fall!
Face Routine
I started by using this primer, it really helps to fill in pores and smooth the skin for a very airbrushed look! Then, I went in with this foundation and oh my gosh y’all – I’m obsessed!! I’ve been using it for about two weeks now and I can’t get enough. It lasts all day and has the most beautiful semi-matte finish. Next, I set my face with this powder in the shade “medium”. Then, I contoured the usual spots with my favorite contour shade of all time, this one and top it all off with this bronzer and blush (in the shade ‘The Climax’ mix with “First Love”).
Bring on the glam
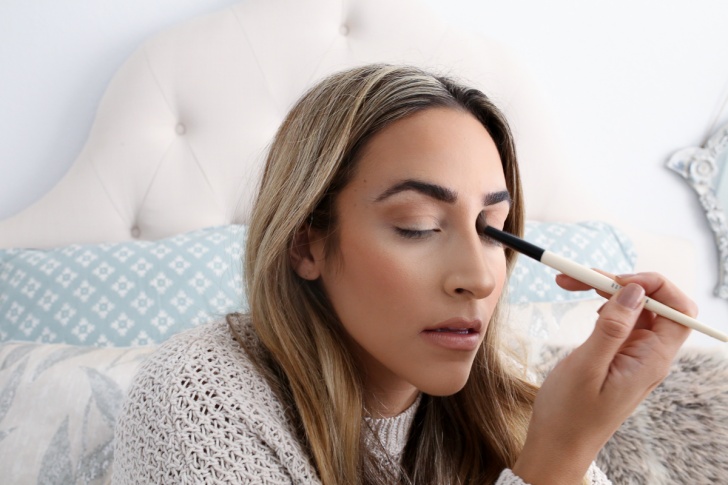
Step 1 / Transition color
The first and most crucial step to this look is adding a transition color in the crease. My favorite way to do this is actually just to use my bronzer on a big fluffy brush and buff it back and forth in windshield wiper motions. You don’t need to be precise about this at all! This step is key to making sure the whole eye look blends like a dream.
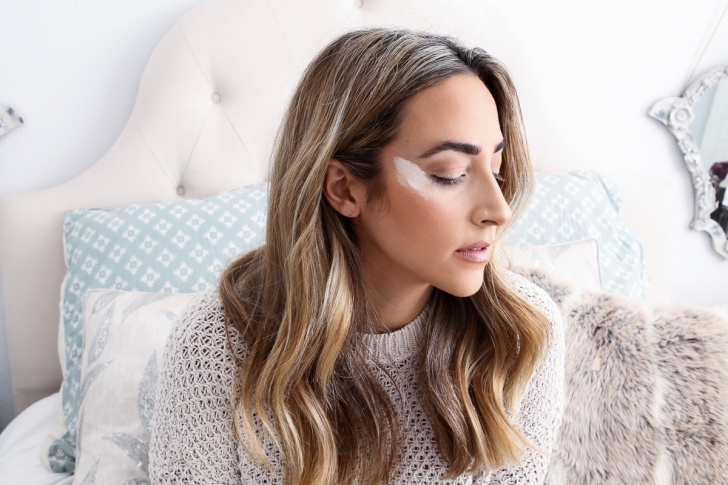
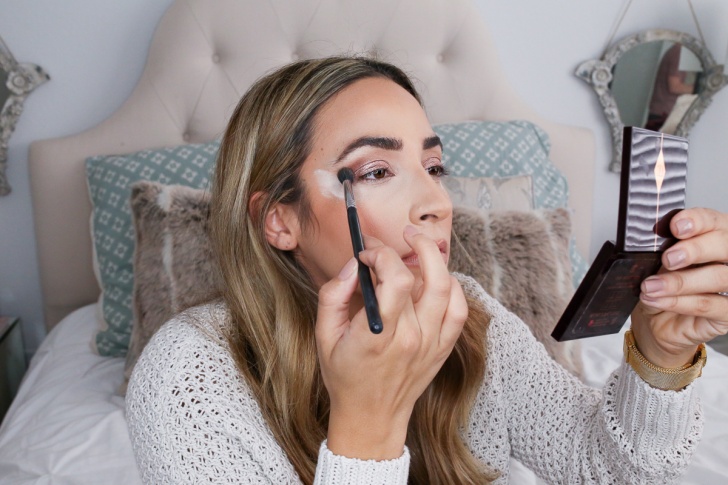
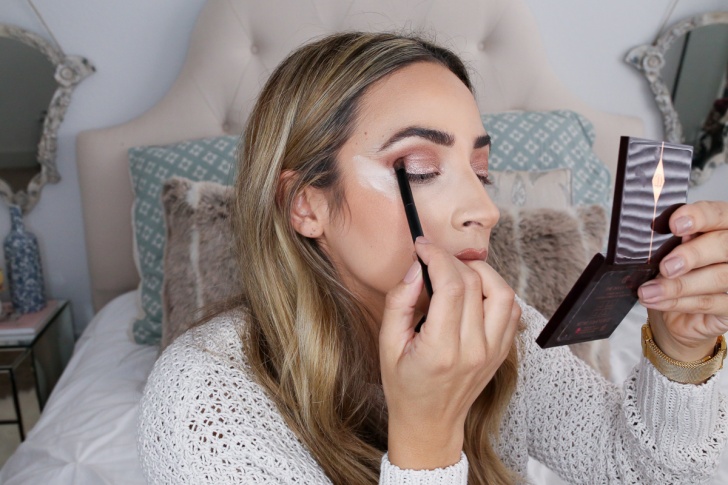
Step 2 / The powder trick
BYOB Tip: This next step is one of my favorite tips and something I do almost every time I do a more glamorous or smokey eye! Take a damp beauty blender and dip it in a translucent powder and place it at an angle on the side of your eye (as seen below). This will help to create and more clean look and also catch any potential fall out from darker shadows!
Step 3 / Cream base
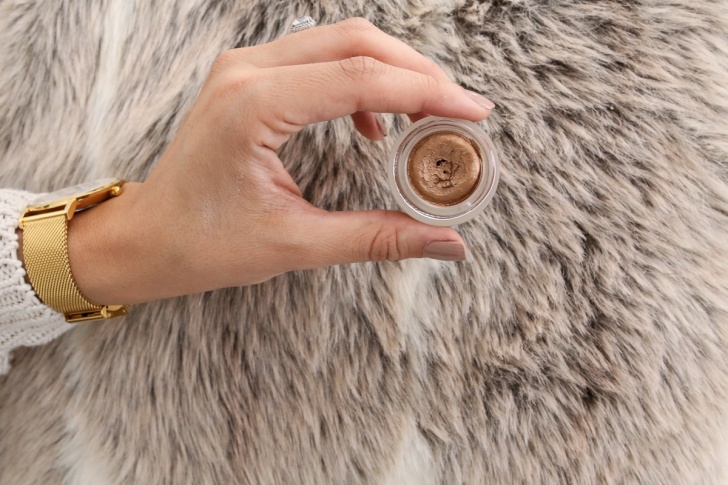
I just use my finger and pat this stunning cream shadow all over my lid. I have a few and love them all, but today I used one of my favorites, “Bette”. Side note, I also love wearing them alone for an easy and quick fall look!
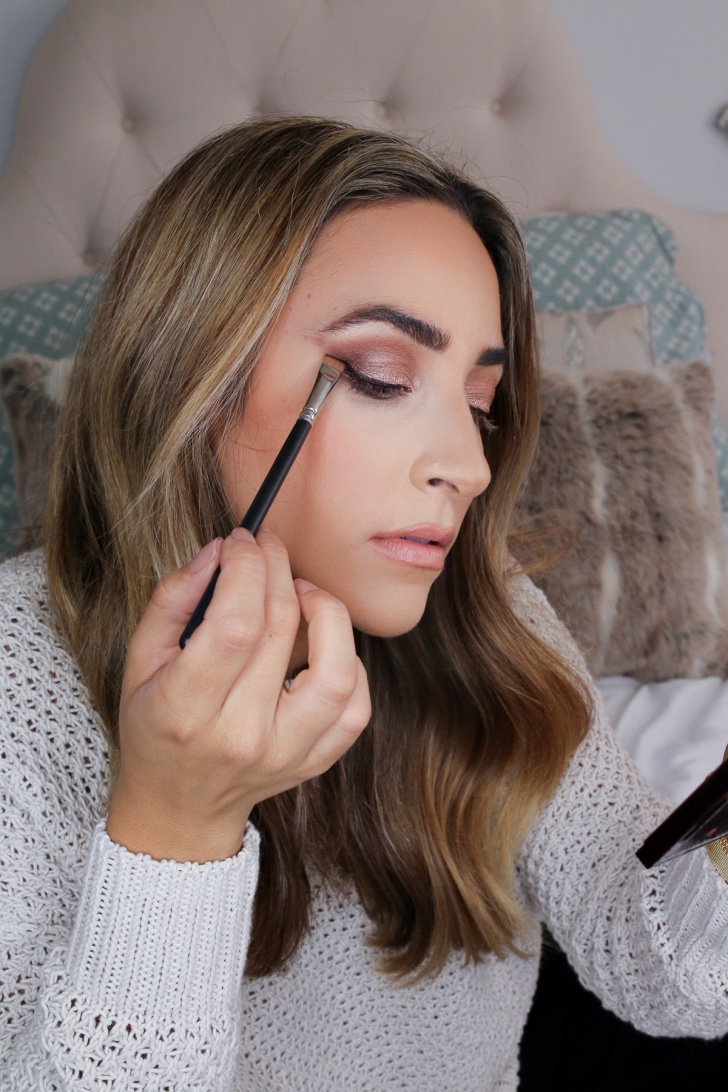
Step 4 / Amp it up
Once you create the perfect base (the cream shadow will also ensure it lasts all day!), it’s time to amp it up! Next, I took a flat shader brush and went in with one of my favorite pigments of all time. This one is the shade ‘Tan’. Fun fact: I love this pigment so much that it’s actually the color I wore on my wedding day! It’s the most gorgeous rose gold, not to mention that you barely need any and it lasts forever. I’ve had mine for over two years and it looks brand new!
BYOB Tip: To take the look up another notch, spray your brush with Fix Plus and then dip into the shadow – this will make it extra metallic.
Step 4 / Smoke it out
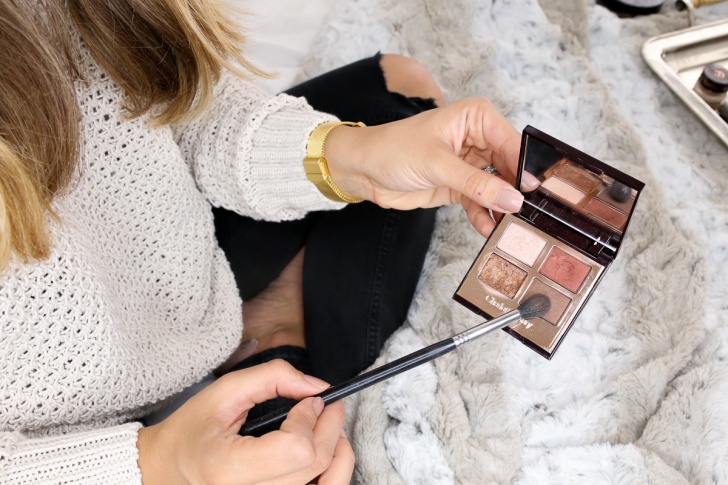
Now it’s time to add some drama! For this, I used one of my favorite quads for fall, this one in ‘The Dolce Vita’. I take the reddish brown and blend it back and forth in the crease.
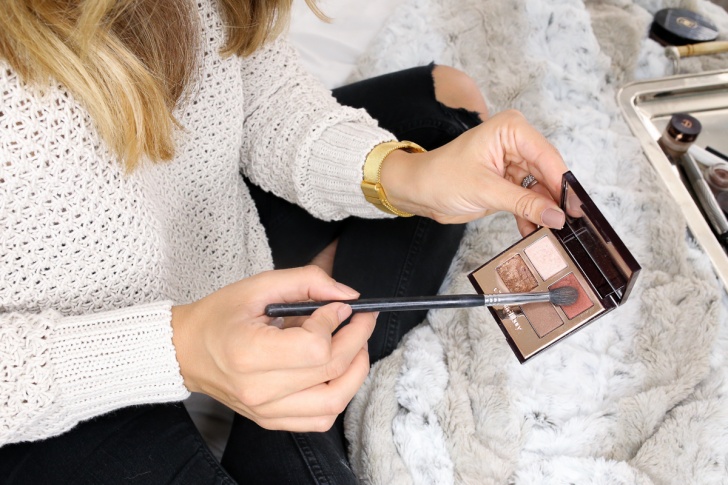
Then, I add the smaller brush and go into the darkest shade in the palette and place it on the outside half of my eye. Lastly, I used a little bit of a really dark brown on the very outer v of my eye. Starting with a lighter shade and getting progressive darker gives the eye a really beautiful gradient look and helps to elongate it while also adding a cat-eye feel.
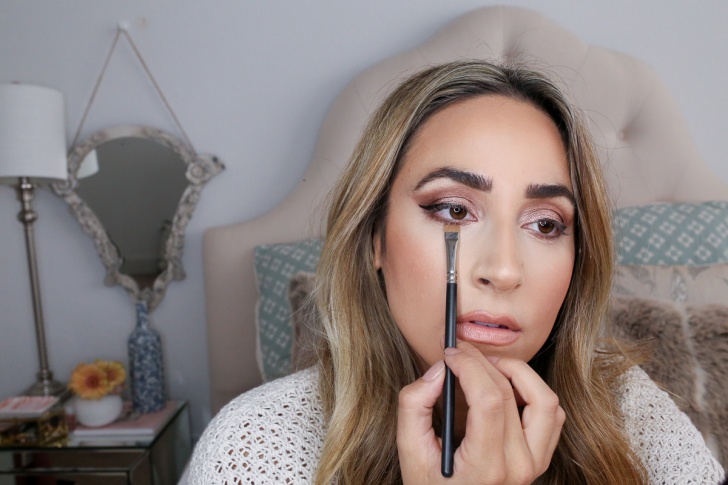
Step 5 / Dust it away
The best part? Time to dust away the powder! You’ll see that any shadow that dropped onto the powder is easily wiped away and you’re left with a nice clean line of shadow.
Step 6 / Liner
I wanted to add a little extra somethin’ somethin’ with the liner, so I started with my standard winged liner. My personal favorite way to create the perfect wing is with a liquid liner, but whatever you’re used to is fine! Then, I dipped back into the dark brown (you could also use black here) and used an eyeliner brush to go over my wing, really smoking it out and adding a sultry look!
Step 7 / Lower lash line
If you wanted to keep the look a little more day appropriate, you could leave the lower lash line totally blank, but you guys requested glam so I wanted to go all out here! I used the bronzer from above on the lower lash line and then went in with the reddish brown. Make sure that you take it up to meet the edge of the cat eyes because this really helps tie the whole look together!
Then, I topped it all off with my mascara routine (this primer and this mascara).
Nude Lips
Last but not least, I finished the look with one of my favorite nudes, this one in the shade ‘Penelope Pink’.
Well, that’s it beauties! Would you rock a glam look with a cozy sweater? If you recreate this look, be sure to tag me on social media so I can check it out! 🙂
Thank you to Nordstrom for Sponsoring this post. All opinions are my own!
