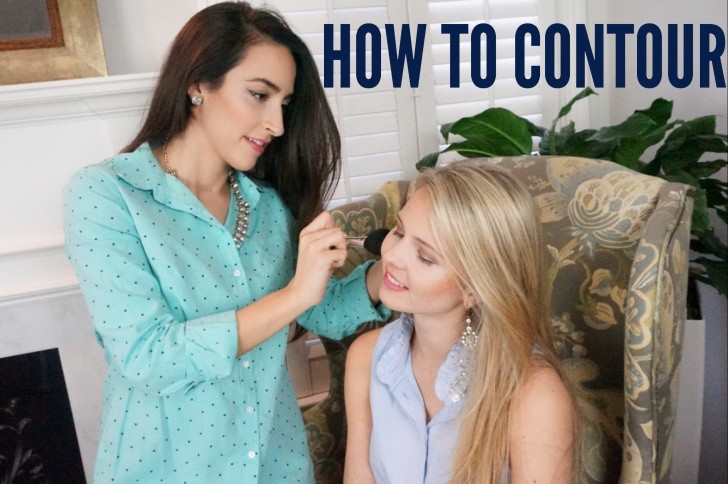

Ah, the infamous contour – Learning to contour is something that will completely change your makeup routine for the better! I know it looks hard, but I promise it’s easy! The point of contouring and highlighting is to bring forward (highlight) and create shadows (contour) in specific parts of the face to add dimension and structure. If you have good cheekbones, this will enhance them and if you don’t, this will help create the illusion that you do!
Meet my good friend, Jayna. I sweet talked her into being my contour model for the day (thanks, J)!
There are two ways to contour – with cream and with powder. Today I will be showing you how to use them both together, but of course you can use just one or the other if you prefer! Cream contours, when done right, can look beautiful and very natural. I prefer using a cream contour in the winter because my skin is dry, but if you are oily year round then a powder will probably work better for you. In this post I am just going to go over the contouring part. I will do a whole separate post on cream highlighting!
Here’s what you’ll need –
- Foundation
- Something to contour with – bronzer and/or a stick foundation that is a few shades darker than your skin. You can also use a liquid foundation, but I find a stick easier for learning.
- A brush to blend the cream contour out with, and a brush to use with the powder bronzer.
Step 1 – Apply your foundation (I’ll be doing a post all about foundation in the near future).
Step 2 – Find your cheekbones! This can be really easy or kinda hard depending on your face shape but never fear, the fish face is here! Ok, I know you might feel a little funny when you suck your cheeks into the well known “fishy face”, but that’s ok because you’re in your bathroom and no one can see you. So, you go girl.
Step 3 – Draw a line with the contour color under your cheek bone. When you blend this out, it is going to go a little above and a little below, so when you starting out it’s ok if the line is a little high, just make sure that you don’t bring it too low or too far into the center of your face. You want to keep that area bright and highlighted (I will talk more about that in my future highlight post – so stay tuned). If you are still having a hard time finding where to the draw the line, a good rule of thumb is to start at the top of your ear and draw down.

Step 4 – Next, dot the color on your forehead right around your hair line. This will completely warm up your whole face and brings the contour together.
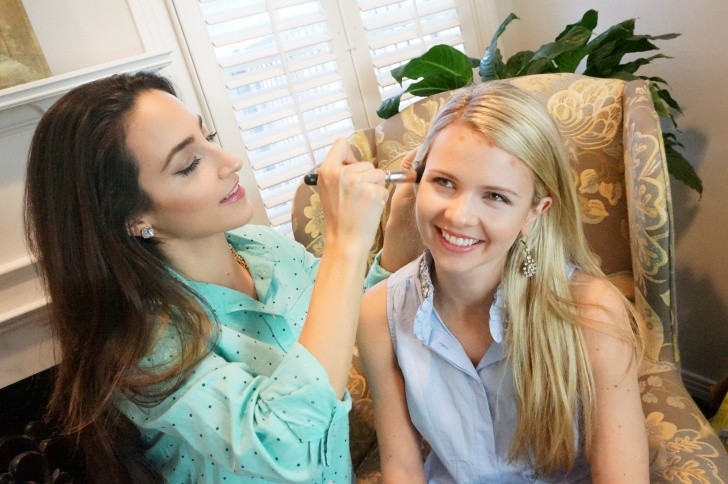
Step 5 – BLEND!- Here’s the fun part and also the part you need to pay the most attention to. The last thing you want is to go out with lines and dots on your face, so… blend, blend, blend! You can use any brush that you like but I am using my Mac 130 Short Duo Fibre Brush. It’s just a short stippling brush that allows me to blend really well with out taking away the product too much. When you blend under your cheek bones you want to make sure that you blend up and back. I usually go in little swirling motions, making sure not to drag the product around too much. You don’t want to bring this in to the center of your face just back and up towards your ear.
Step 6 – Take whatever product is left on your brush and run it under your jaw. This just helps to create a shadow and define your jaw line. Good tip – Think about creating a 3 on the side of your face, the top of the 3 is the dots at the hair line, the middle of the 3 is under the cheek bone and the bottom is along the jawline. Also, do the same with your temple, up against your hair line, connecting everything.
Step 7 – Once you have contoured your face with the cream, you are going to set it with the powder! This is the easy part, very lightly dip your brush in the bronzer and tap it on the side to get off the excess powder. Then, follow the contour you have already created! We are just doing this to ensure that the contour will stay put and not move around throughout the day. If you want to do all of the contouring with just powder and not use the cream at all that is completely fine too! Follow all of the same steps but using the powder in place of the cream. Where you draw the lines, use your brush to create the cheek contour and sweep the brush across the top of the forehead where the dots would be.
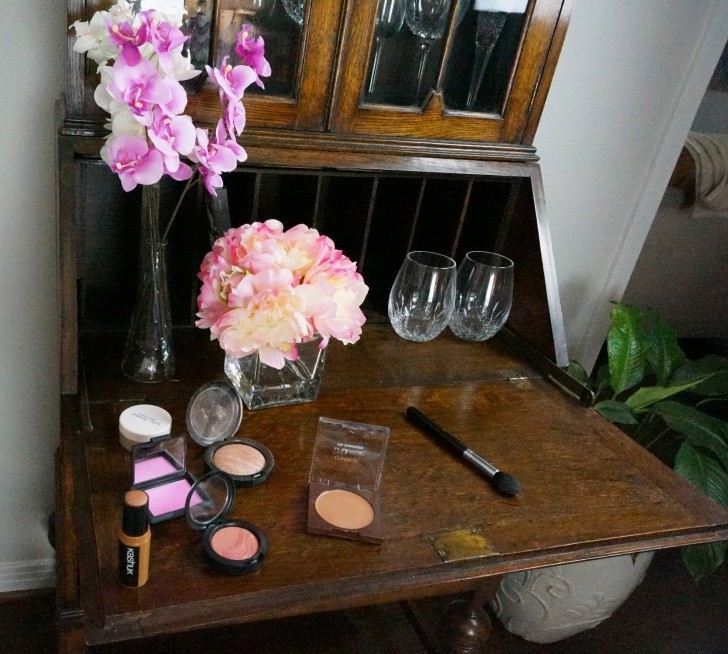
Here are a few products that I like to use while contouring –
- Sonia Kashuck foundation stick
- Bobbi Brown foundation stick
- Two Faced Chocolate Soleil Bronzer – mentioned in my “Fresh Face for the Gym” post.
It seems like a lot of steps but I wanted to make that I explained everything in detail! Once you do it a few times it will only take you a minute or two. Remember, this is supposed to look natural so make sure you are light handed when applying the contour. Less is more in the learning stage! Well, that’s it for now. I hope you enjoyed this and let me know what you think 🙂
XO. Courtney